
Summary:
You’re researching metal roofing installation because you know a 40-year roof depends on more than just the panels you buy. The installation techniques matter just as much as the materials—maybe more. Improper fastening voids warranties. Wrong panel alignment compounds into problems you won’t see until the first heavy rain. Skipped underlayment leads to condensation damage that eats away at your deck.
This isn’t about scaring you away from metal roofing. It’s about understanding what separates professional installation from the shortcuts that create callbacks. You’ll learn the techniques that matter, the mistakes that cause failures, and what to look for when evaluating contractors in Monmouth County, NJ.
How to Install Metal Roofing Panels Correctly
Laying metal roofing starts long before the first panel goes up. Your roof deck needs inspection for damage, rot, or uneven spots that will telegraph through the metal and create visible waviness. Metal panels reflect what’s underneath them, and once they’re installed, fixing substrate issues means removing everything you just put down.
Underlayment goes on next, and this step gets skipped more often than it should. You need synthetic or high-temperature underlayment rated for metal roofing—not standard asphalt-based products that melt in the heat trapped under metal panels. Building codes in New Jersey often require specific underlayment types, and using the wrong one voids your warranty before you even start.
Panel layout planning happens before you cut anything. You’re figuring out where seams land, making sure the first and last panels are equal width, and confirming that pipe penetrations fall in panel centers instead of on seams. Get this wrong and you’re either living with an unbalanced look or cutting panels you already ordered to the wrong size.
Proper Panel Alignment and Fastening Methods
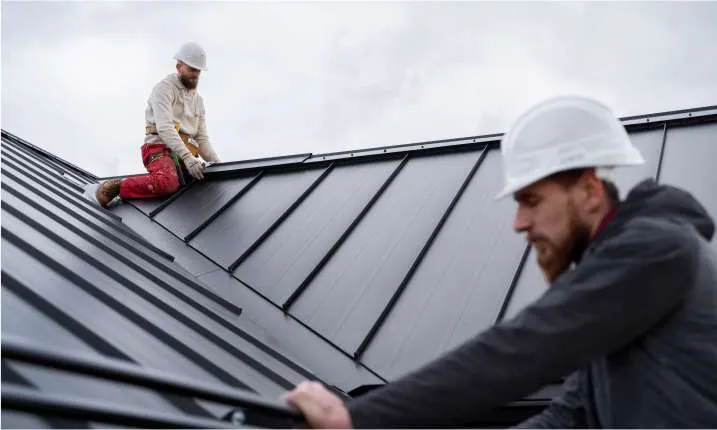
The first panel sets the tone for your entire roof. If it starts even slightly off-square, that error compounds across every panel you install after it. By the time you reach the opposite rake, your seams won’t align, your final panel won’t fit, and you’re pulling off multiple panels to fix what should have been caught at the beginning.
We snap chalk lines using the 3-4-5 triangle method to square off the roof before placing the first panel. You’re measuring from a fixed reference point—usually the eave—and confirming that your panel runs parallel to it at both the top and bottom. This takes extra time upfront but saves hours of correction work later.
Fastening techniques vary depending on whether you’re installing exposed fastener panels or concealed fastener systems like standing seam. Exposed fasteners go through the panel into the deck, and the placement matters more than most people realize. Screws placed in valleys instead of ridges on corrugated panels create leak points. Screws driven too tight deform the panel and crush the rubber washer that’s supposed to seal out water. Under-tightened screws leave gaps where moisture gets in.
Standing seam systems use hidden clips that attach to the deck but stay concealed under the next panel. These clips need proper spacing—typically every 12 to 24 inches depending on wind load requirements—and they can’t be over-tightened or they’ll restrict the panel’s ability to expand and contract with temperature changes. Metal moves as it heats and cools, and if your fastening system doesn’t account for that movement, you end up with buckled panels, distorted seams, or fasteners that pull loose over time.
Sealants and closure strips fill the gaps where panels meet trim or where corrugated profiles need protection from water and insects. You need sealants specifically made for metal roofing—not generic caulk that breaks down under UV exposure or temperature cycling. Closure strips go at the eaves to block the space under the panel ribs, and they need to be positioned correctly so they don’t interfere with drainage or create trapped moisture pockets.
Panel overlap matters too. Each panel needs to overlap the previous one by at least one full rib, and the overlap direction should face away from prevailing winds so wind-driven rain doesn’t force water under the seams. In Monmouth County, NJ, where nor’easters and coastal winds hit regularly, getting the overlap direction wrong turns your roof into a leak waiting to happen.
Metal Roof Underlayment and Deck Preparation
Your roof deck determines how your metal panels perform over the next 50 years. Any deflection, unevenness, or soft spots in the decking will show through the metal as visible waves or oil canning. Once the panels are installed, fixing deck problems means tearing off the new roof you just paid for, repairing the substrate, and starting over.
Inspection before roof installation catches the issues that cause callbacks. You’re looking for rotted plywood, loose boards, inadequate ventilation, and structural damage from previous leaks. In older homes throughout Monmouth County, it’s common to find deck sections that need replacement before any new roofing goes on. Skipping this step to save time or money creates problems that surface after the first winter when ice dams expose weak spots or after summer heat causes improperly ventilated decks to warp.
Underlayment installation requires attention to detail that gets overlooked when crews rush. Synthetic underlayment needs to lay flat without wrinkles, overlap by at least 4 to 6 inches between rows, and get secured with cap nails or staples that don’t create raised spots under the metal. High-temperature peel-and-stick membranes go in valleys and at eaves where ice dams and water pooling create the highest risk of leaks.
Standard asphalt-based underlayment doesn’t work under metal roofing because the heat buildup between the metal and the deck can cause it to melt and ooze out from the eaves as tar-like drips. You need products rated for the higher temperatures that metal roofing creates, and using the wrong type voids manufacturer warranties even if everything else about the installation is perfect.
Drip edge and eave trim installation happens after underlayment but before panels. The drip edge directs water away from the fascia and into gutters, and it needs to be flush with the roofline and properly aligned so panels can overhang by the recommended 1 to 2 inches. Get the drip edge placement wrong and you’re either cutting panels short or dealing with water that runs back under the roof edge instead of draining off properly.
Ventilation planning matters more with metal roofing than with asphalt shingles because metal doesn’t breathe. Trapped heat in the attic accelerates shingle aging on traditional roofs, but with metal, inadequate ventilation leads to condensation on the underside of the panels that drips onto your insulation and deck. Proper ridge vents, soffit vents, and airflow paths need to be in place before panels go on, or you’re creating moisture problems that won’t show up until mold starts growing in your attic.
Standing Seam Metal Roof Systems Installation
Standing seam systems represent the premium end of metal roofing, with concealed fasteners, clean lines, and installation techniques that require more precision than exposed fastener panels. The panels interlock at raised seams that run vertically from eave to ridge, and those seams get mechanically crimped or snapped together to create a weather-tight seal.
Panel profiles vary between snap-lock systems and mechanically seamed systems. Snap-lock panels have male and female legs that lock together with hand pressure or a rubber mallet—no expensive seaming tools required. Mechanical seam systems need specialized equipment to crimp the seams together, but they offer better performance on low-slope roofs and in high-wind areas. The profile you choose affects installation time, labor costs, and the minimum roof slope where the system performs correctly.
Clip placement and spacing determine how well your standing seam roof handles thermal expansion. The clips attach to the deck and hold the panel in place, but they need to allow the panel to slide as it expands and contracts with temperature changes. Fixed clips go at one end of the panel—usually at the eave or ridge—and sliding clips go everywhere else. If you install all fixed clips or over-tighten the sliding clips, the panel can’t move and you end up with buckled metal, distorted seams, or fasteners that pull loose.
Flat Seam Metal Roof Installation Details
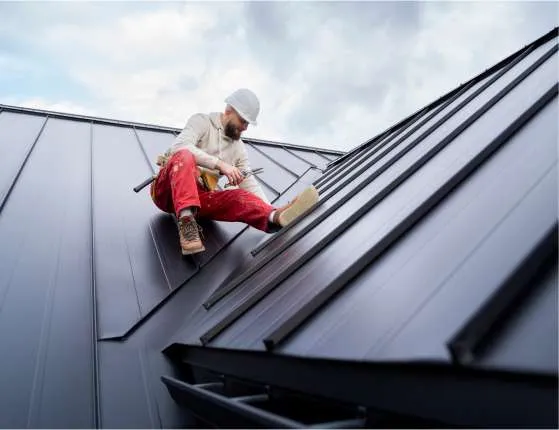
Flat seam metal roofing creates a smooth, uninterrupted surface where individual panels lock together without raised ribs. The seams lay flat against the roof, giving you a sleek appearance that works well on lower-slope applications where standing seam profiles might not be appropriate. Installation requires soldering or mechanical locking at the seams, and the precision needed makes this a technique for experienced installers, not DIY projects.
Panel preparation starts with cutting and bending the edges to create interlocking joints. Each panel gets a male and female edge formed using a brake or hand-seaming tools, and those edges need to be perfectly straight and uniform or the panels won’t lock together correctly. Any waviness or inconsistency in the edge bending shows up as visible seam irregularities once the panels are installed.
Seaming techniques for flat seam roofs typically involve either soldered seams or mechanical locking seams. Soldered seams create a watertight bond by melting solder along the joint between panels, but this requires skill to avoid overheating the metal or creating weak spots where the solder doesn’t fully penetrate. Mechanical locking seams use specialized tools to fold and crimp the panel edges together without solder, which speeds up installation but requires proper technique to ensure the seam stays locked under wind uplift and thermal cycling.
Underlayment and substrate preparation matter even more with flat seam systems because these roofs typically go on lower slopes where water drainage happens more slowly. You need high-quality waterproof membranes under the panels, proper slope to prevent standing water, and flashing details that account for the reduced drainage compared to steeper roofs. In Monmouth County’s climate, where heavy rain and snow melt create significant water volume, flat seam roofs need extra attention to drainage paths and valley design.
Flashing integration at walls, chimneys, and roof penetrations requires custom metalwork that matches the flat seam profile. You can’t use standard flashing components designed for corrugated or standing seam systems because they won’t lay flat or integrate properly with the seam pattern. We fabricate custom flashing pieces on-site, bending and soldering them to create continuous waterproof transitions from the roof surface to vertical surfaces.
Thermal movement management becomes critical on flat seam roofs because the large, unbroken panel surfaces expand and contract more noticeably than smaller panels with frequent seams. Expansion joints need to be planned into the roof layout at regular intervals—typically every 30 to 40 feet depending on the metal type and color—and these joints need to allow movement while maintaining a watertight seal. Dark-colored metals expand more than light colors, and copper or zinc expand differently than steel or aluminum, so the expansion joint spacing varies based on your material choice.
Mechanical Seam Metal Roof Systems and Techniques
Mechanical seam systems use specialized seaming machines to crimp the raised seams where panels interlock. The seaming process happens on the roof after panels are positioned, and it requires equipment that walks along the seam while folding and compressing the metal to create a weather-tight double-lock or triple-lock seam. This installation method takes more time and specialized tools compared to snap-lock systems, but it delivers superior performance on low-slope roofs and in extreme weather conditions.
Seaming machines come in manual and electric versions, and the type you use affects installation speed and seam consistency. Manual seamers require physical effort to operate as you walk them along the seam, crimping the metal in stages until the seam is fully closed. Electric seamers do the crimping automatically, producing more consistent results with less physical labor, but they cost more and require power on the roof. The seam quality depends on proper machine setup, consistent walking speed, and making sure the panel edges are correctly aligned before you start seaming.
Panel alignment before seaming determines whether your seams run straight or develop the sawtooth pattern that happens when panels drift off-square. Each panel needs to be positioned so it’s parallel to the reference line you snapped earlier, and you need to check alignment at both the eave and ridge before you commit to seaming. Once the seam is crimped, you can’t easily undo it without damaging the panel edges, so getting alignment right before seaming matters more than rushing to finish.
Structural standing seam metal roof systems add another layer of performance by using thicker metal and structural clips designed to span wider distances between roof purlins or deck supports. These systems work well on pole barns, commercial buildings, and residential applications where you want to minimize the amount of deck sheathing or eliminate it entirely. The panels attach to purlins spaced 2 to 5 feet apart instead of continuous decking, and the clips are engineered to handle the load without sagging or deflecting.
Installation of structural standing seam systems requires more attention to purlin spacing, clip load ratings, and panel span limitations. You can’t just install panels on any spacing and expect them to perform—each panel profile has maximum span ratings based on metal thickness, rib height, and expected wind and snow loads. Exceeding those span limits leads to panels that deflect under load, creating visible waviness or even structural failure in extreme weather.
Clip selection for mechanical seam systems needs to match the panel profile, roof slope, and expected thermal movement. Fixed clips go at one end of each panel to anchor it in place, while sliding clips everywhere else allow the panel to expand and contract without restriction. The clip height also matters because it determines how much airspace exists between the panel and the deck or insulation below. Higher clips provide more room for thick insulation in energy-efficient designs, while lower clips create a tighter profile that works better on retrofit applications over existing roofs.
Choosing Professional Metal Roofing Installation in Monmouth County, NJ
Laying metal roofing correctly requires understanding techniques that most homeowners don’t see until problems surface years after installation. Proper panel alignment, fastening methods that account for thermal expansion, and underlayment rated for metal roofing temperatures all determine whether your investment lasts 50 years or needs repairs within the first decade.
The installation mistakes that void warranties and cause leaks aren’t always obvious during installation. They show up after temperature cycling, after the first nor’easter, or after enough time passes that your installer has moved on to other projects. That’s why choosing contractors with proven experience in metal roofing—not just general roofing—matters more than finding the lowest bid.
We bring over 40 years of metal roofing installation experience to Monmouth County, with owner-supervised projects and installers trained specifically in standing seam, mechanical seam, and structural metal roofing systems. If you’re ready to move forward with a metal roof that’s installed correctly the first time, reach out for a same-day estimate and see what proper installation techniques look like in practice.