Summary:
Pre-Installation Preparation and Material Delivery
Before the first shingle gets removed, the groundwork for your successful installation begins. Your materials typically arrive 1-2 days before installation starts—either staged on your roof or positioned in your driveway for easy access.
This isn’t just about convenience. Early delivery allows our crew to inspect every bundle, verify quantities, and confirm you’re getting exactly what was specified in your contract. No surprises, no substitutions, no delays because something didn’t arrive.
We also coordinate dumpster placement during this phase, positioning it to protect your landscaping while giving our crew efficient access for debris removal.
Site Protection and Safety Setup
Professional roof installation starts before anyone steps on your roof. We protect your property systematically because cleanup problems create bigger headaches than installation problems.
Your landscaping gets covered with tarps. Outdoor furniture, vehicles, and anything breakable gets moved or protected. We set up magnetic sweepers around the work area to catch stray nails—because finding them in your tires later isn’t acceptable.
Safety equipment goes up first. Proper ladder placement, safety harnesses, and fall protection equipment. This isn’t just about our crew’s safety—it’s about professional standards that carry through every aspect of the job.
The owner shows up during this phase. Not a supervisor, not a foreman—the actual owner. That’s how we’ve built our reputation in Monmouth County for over 40 years. When the person whose name is on the truck is present, quality control happens naturally.
You’ll notice the difference immediately. Questions get answered directly. Decisions get made quickly. Problems get solved before they become bigger problems. It’s the kind of attention you can’t get from companies where the owner never sees the actual work.
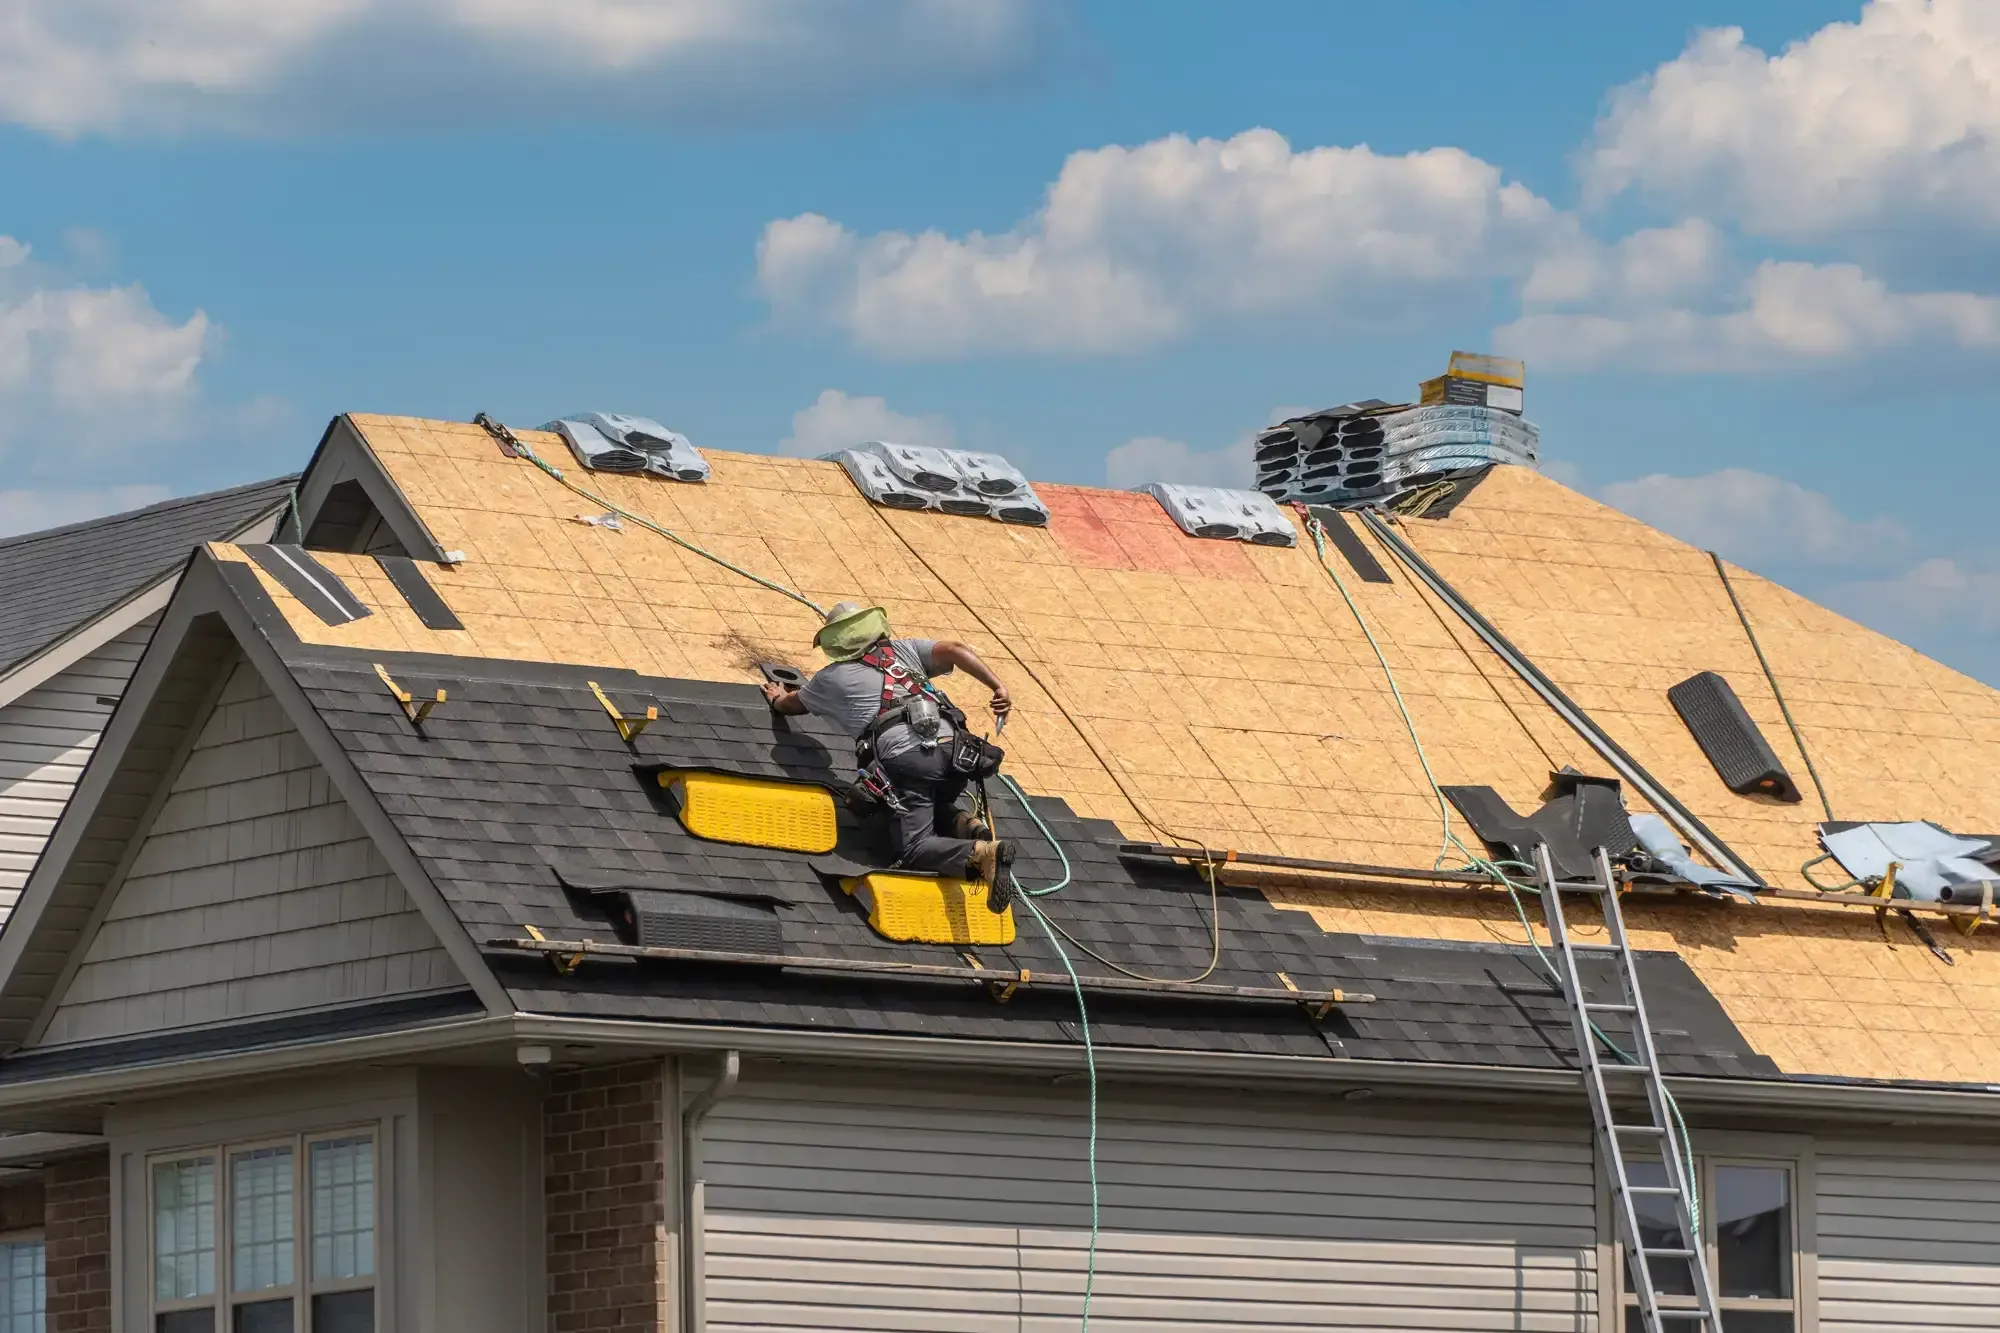
Complete Tear-Off and Deck Inspection
Here’s where the real work begins—and where corners get cut by contractors who don’t understand long-term consequences. Complete tear-off means everything comes off. Old shingles, old underlayment, old flashing. Down to the bare deck.
This is the messiest part of the process, but it’s also the most critical. You can’t build a quality roof on top of old problems. We remove everything systematically, working from ridge to eave, ensuring every old nail gets pulled or pounded flat.
With the deck exposed, inspection begins. We check every square foot for damage, rot, or structural issues. Soft spots get marked. Damaged sections get replaced with matching materials—usually CDX plywood or OSB that matches your existing deck thickness.
This step separates professional installations from quick fixes. Damaged decking that gets covered up becomes expensive problems later. Water damage spreads. Soft spots become holes. What looks fine from above becomes a structural liability underneath.
We document everything. Photos of damage, measurements of replaced sections, notes about deck condition. You get copies because transparency builds trust, and trust builds long-term relationships.
The owner’s presence during deck inspection matters enormously. Decisions about repairs need to be made quickly to keep your project on schedule. When the owner is on-site, those decisions happen immediately instead of waiting for approvals.
Underlayment Installation and Waterproofing Systems
Your underlayment is your roof’s last line of defense—the barrier between your shingles and your home’s interior. In Monmouth County’s challenging climate, this step can’t be rushed or simplified.
We start with drip edge installation along the eaves. This isn’t always required by code, but it’s always required by professional standards. Drip edge directs water away from your fascia boards and gives your roof a clean, finished appearance.
Next comes the underlayment itself. We use materials specifically rated for our coastal conditions—products that handle high winds, temperature swings, and the salt air that accelerates material breakdown near the shore.
Ice and Water Barrier Application
In valleys, around eaves, and at any roof penetration, we install ice and water barrier—a self-adhering membrane that seals around nails and creates a watertight seal even if water gets under the shingles.
This material costs more than standard underlayment, but it prevents the kind of water damage that destroys ceilings and creates mold problems. We install it at every vulnerable spot because Monmouth County’s weather will find every weakness.
The installation technique matters as much as the material. Each course overlaps the previous one by at least 6 inches. Seams get sealed. Air bubbles get worked out. The membrane adheres completely to the deck surface, creating a continuous barrier.
We pay special attention to valleys—the channels where two roof planes meet. These areas handle the most water volume during storms. Standard installation calls for 18-inch-wide valley coverage. We use 24-inch coverage because extra protection costs less than water damage repairs.
Around chimneys, vents, and skylights, we create custom-fit barriers that seal completely around each penetration. This isn’t template work—each situation requires specific techniques to ensure water can’t find a path inside.
Ventilation System Integration
Proper ventilation prevents the moisture buildup and temperature extremes that shorten roof life and increase energy costs. During underlayment installation, we integrate your ventilation system to work with your new roofing materials.
Ridge vents get positioned for optimal airflow. Soffit vents get checked and cleared. The system gets balanced so air moves efficiently from eave to ridge, preventing the hot spots and moisture accumulation that cause premature aging.
In Monmouth County’s humid summers and cold winters, ventilation problems show up fast. Poor airflow creates ice dams in winter and excessive heat buildup in summer. Both conditions damage roofing materials and increase your energy costs.
We calculate ventilation requirements based on your attic square footage and roof design. There’s a specific ratio of intake to exhaust ventilation that creates proper airflow. Too little ventilation causes moisture problems. Too much ventilation in the wrong places creates wind-driven rain infiltration.
Static vents, ridge vents, and powered exhaust fans each have specific applications. We match the ventilation system to your roof design and local weather patterns. What works in inland areas doesn’t always work near the coast where wind patterns and humidity levels create different challenges.
The owner’s involvement during ventilation planning ensures you get the right system for your specific situation. This isn’t a one-size-fits-all decision—it requires experience with local conditions and understanding of how different ventilation systems perform in coastal environments.
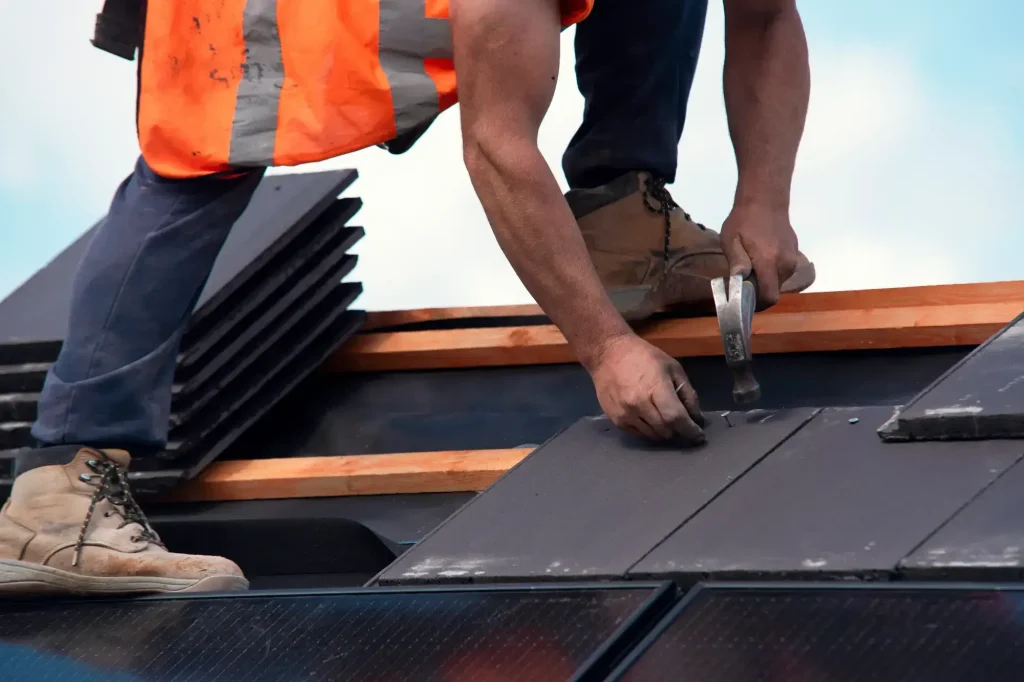
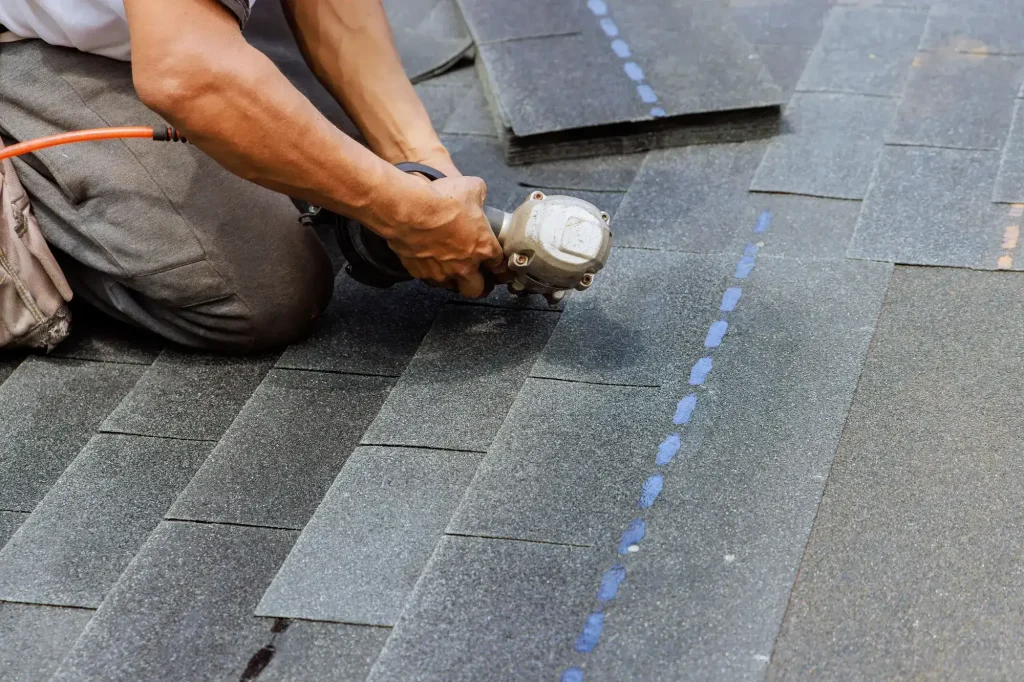
Final Installation and Quality Assurance Process
Shingle installation, flashing details, and final sealing complete your roof system. Each step builds on the previous work, creating the comprehensive protection your home needs against Monmouth County’s challenging weather.
The owner’s presence throughout this process ensures quality control happens at every stage, not just during final inspection. Problems get caught and corrected immediately. Standards get maintained consistently. Your investment gets protected properly.
When you’re ready to move forward with professional roof installation, A Russo Roofing brings over 40 years of local experience to your project. Our owner-supervised installation process, comprehensive warranties, and commitment to quality craftsmanship ensure your roof provides decades of reliable protection.